はじめに
MacでC#をやる場合に、VisualStudio for Macを選ぶのもいいですが、
ここはVSCodeでよしなに開発ができるようにしたいと思いました。
あとdotnet-cliを使ってみたかった。
こんな感じのソリューションを作る
$ tree -L 1
.
|-- Domain
|-- InMemoryInfrastructure
|-- Test
`-- Training.sln
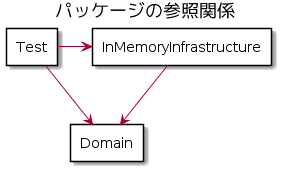
Domain、InMemoryInfrastructureプロジェクトが、クラスライブラリで、
TestがxUnitプロジェクトとなります。
InMemoryInfrastructureプロジェクトが、Domainプロジェクトを参照し、
Testプロジェクトが、InMemoryInfrastructureプロジェクトとDomainプロジェクトを参照するようにします。
VSCodeに必要な拡張機能を入れる
- 必須:C# - Visual Studio Marketplace
- お好み:C# XML Documentation Comments - Visual Studio Marketplace
- お好み:C# FixFormat - Visual Studio Marketplace
1つ目だけだと、Documentation Commentが記述(///打ったら→ <summary></summary>と出るやつ)できないため、2つ目も入れておくと良いと思います。
3つ目は、ソースコードを自動で整形したい人用。
こちらの記事を参考にさせて頂きました。
Visual Studio CodeでC#プログラミング - Qiita
dotnet-cliインストール
.NET Tutorial | Hello World in 10 minutes
こちらのインストールガイドを元に、インストールをする。
ソリューションとプロジェクトを作る
$ mkdir Training &&cd$_$ dotnet new sln
The template "Solution File" was created successfully.
$ ll
-rw-r--r--  1 user  staff  540 Jan  5 23:42 Training.sln
$ dotnet new classlib -o Domain
$ dotnet new classlib -o InMemoryInfrastructure
$ dotnet new xunit -o Test
$ ll
drwxr-xr-x  5 user  staff  160 Jan  5 23:54 Domain
drwxr-xr-x  5 user  staff  160 Jan  5 23:55 InMemoryInfrastructure
drwxr-xr-x  5 user  staff  160 Jan  5 23:55 Test
-rw-r--r--  1 user  staff  540 Jan  5 23:51 Training.sln
作るときに、ただ classlibテンプレートを選ぶだけだと、frameworkのバージョンがnetstandard2.0となってしまうので、frameworkのバージョンを変更したい場合は、fオプションで指定をする。
$ dotnet new classlib -f netcoreapp2.1 -o SampleProject
この状態だと、まだソリューションに追加がされてないので、
ソリューションにプロジェクトを紐付けます。
$ dotnet sln list
No projects found in the solution.
$ dotnet sln add ./Domain/Domain.csproj
Project `Domain/Domain.csproj` added to the solution.
全て関連付けるとこんな形になります。
$ dotnet sln list
Project(s)----------
Domain/Domain.csproj
InMemoryInfrastructure/InMemoryInfrastructure.csproj
Test/Test.csproj
プロジェクトの参照も追加します。
$ dotnet add ./Test/Test.csproj reference Domain/Domain.csproj
Reference `..\Domain\Domain.csproj` added to the project.
最初ぱっと見て、慣れなかったのですが、add [参照する側のプロジェクト] reference [追加するプロジェクト参照]となります。
[参照する側のプロジェクト]を省略したら、カレントディレクトリのプロジェクトになる模様。
dotnet add reference コマンド - .NET Core CLI | Microsoft Docs
参照追加が成功すると、csprojファイルに参照プロジェクトが追加されます。
<ItemGroup><ProjectReferenceInclude="..\Domain\Domain.csproj"/></ItemGroup>なお、参照を外したい場合には、removeで出来ます
$ dotnet remove ./Test/Test.csproj reference Domain/Domain.csproj
ソースコードを書く
とりあえずテスト用に足し算をする為のソースを書いてみます。
namespaceDomain{publicclassCalc{publicstaticintSum(intleft,intright){returnleft+right;}}}usingXunit;usingDomain;namespaceTest{publicclassCalcTest{[Fact]publicvoid足し算の結果が正しく出てくること(){intresult=Calc.Sum(1,2);Assert.Equal(3,result);}}}テストをする
dotnet testコマンドを叩くだけで、[Fact]と書かれたテストケースを全て実行してくれます。
$ dotnet test・
・

Test Run Successful.
Total tests: 1
     Passed: 1
 Total time: 1.1632 Seconds
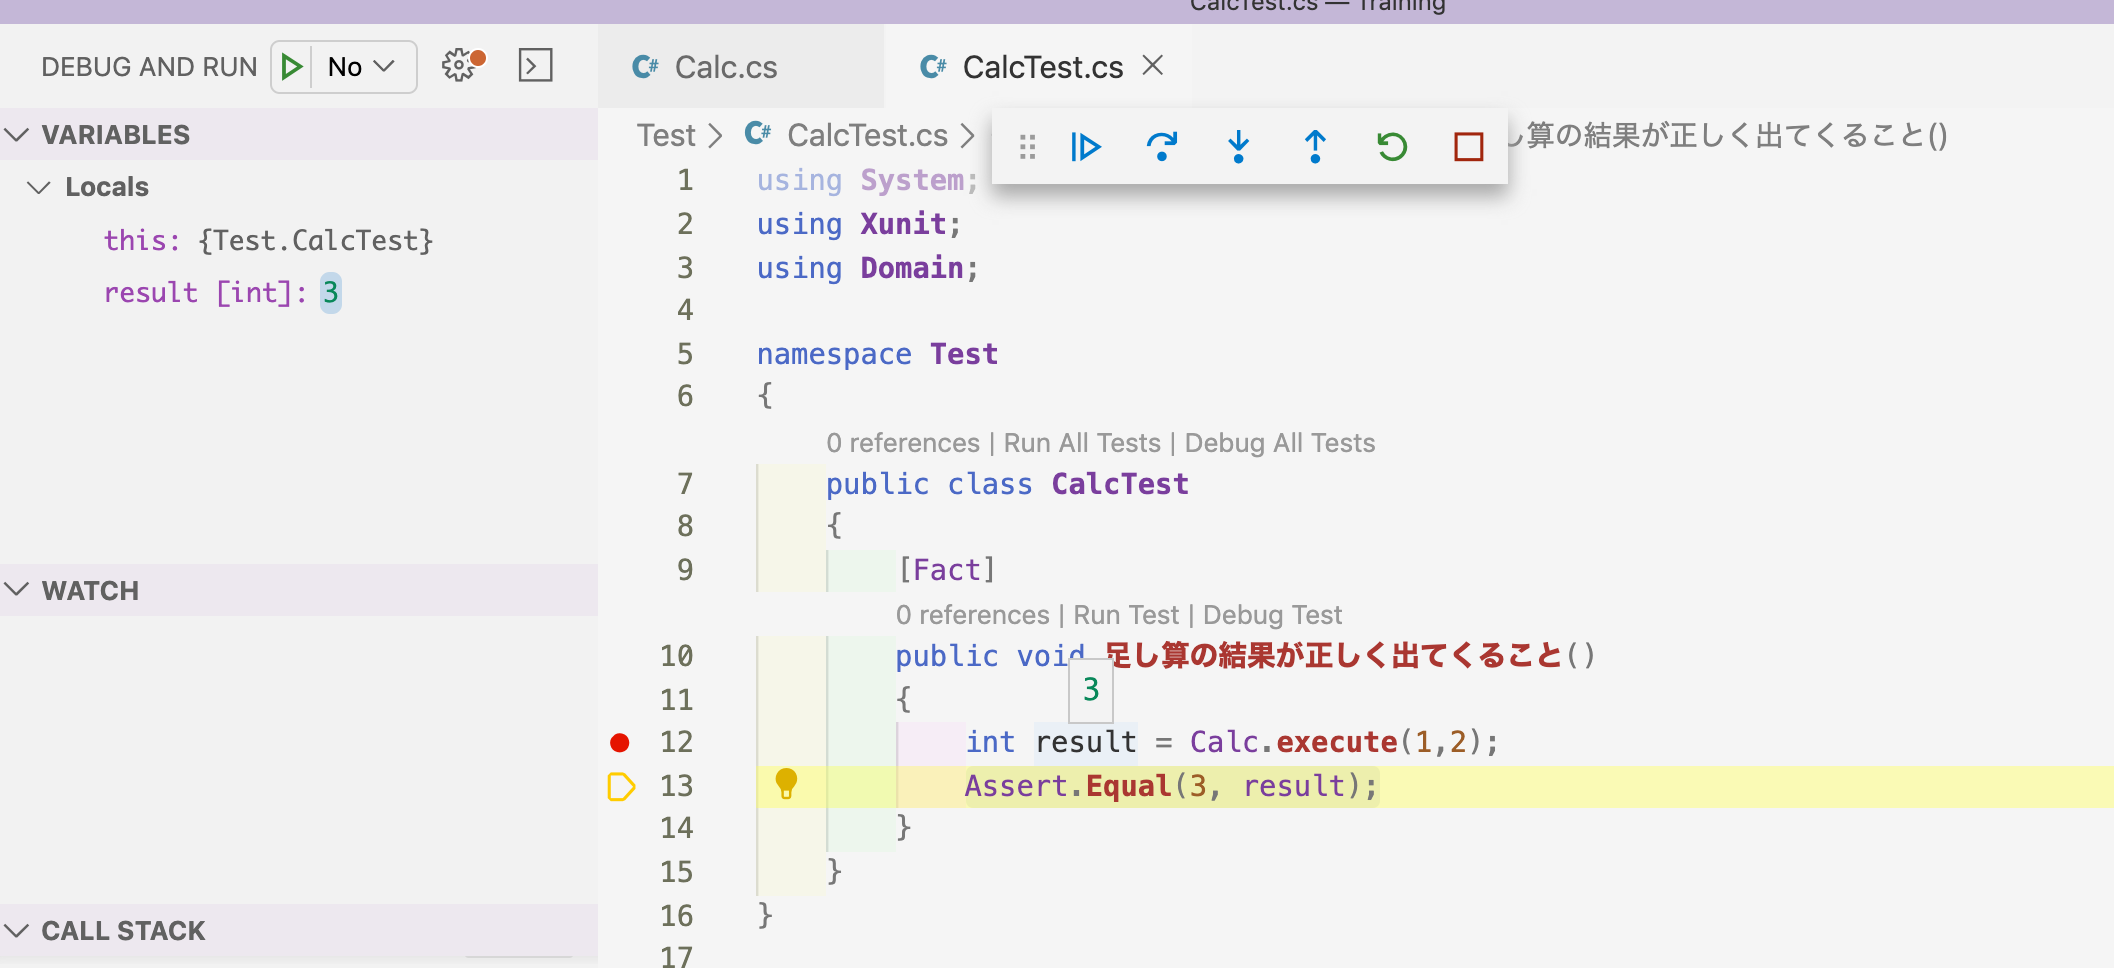
デバッグテストも出来ます。[Fact]属性を付けたメソッドに、Debug Testと選べるようになっているので、
そちらをクリックすれば、デバッグができます。
dotnet testコマンドの使い方
選択的単体テストの実行 - .NET Core | Microsoft Docs
こちらに詳細が書かれていますが、
dotnet testには--filterオプションがあり、特定のテストのみ実行というやり方も可能です。
filter例
| コマンド | 内容 |
|---|---|
| dotnet test | すべてのテストを実行する |
| dotnet test --filter "Category=CategoryA" | CategoryAに属するテストのみ実行 |
| dotnet test --filter "DisplayName~TestClass1" | TestClass1が含まれるテストを実行 |
| dotnet test --filter DisplayName~TestClass1&Category=CategoryB | TestClass1が含まれるかつ、CategoryBに属するテストのみ実行 |
Categoryは、xUnitの場合[Trait]属性でカテゴリ分けが出来ます。
パラメータ付きテストを行う
xUnitの場合、[Fact]の代わりに[Theory]属性を付けて、
パラメータ付きのテストを行えるようなので、試してみます。
publicclassCalcTest{[Theory][InlineData(1,2,3)][InlineData(2,3,5)][InlineData(10,20,30)][Trait("Category","カテゴリA")]publicvoid足し算の結果が正しく出てくること(intleft,intright,intexpected){intresult=Calc.Sum(left,right);Console.WriteLine($"left: {left}, right: {right}, expected: {expected}");Assert.Equal(expected,result);}}$ dotnet test..
A total of 1 test files matched the specified pattern.
left: 1, right: 2, expected: 3
left: 2, right: 3, expected: 5
left: 10, right: 20, expected: 30
Test Run Successful.
Total tests: 3
Passed: 3
Total time: 1.3111 Seconds
おまけ:必要なNugetパッケージをプロジェクトに追加する
便利な外部ライブラリを追加する際には、dotnet add packageコマンドを使用します。
※NugetパッケージマネージャーコンソールのInstall-Packageに相当するものだと思っています。
参照追加したいプロジェクトを指定するか、もしくはプロジェクトフォルダまで移動して、コマンドを叩きます。
$ dotnet add Test/Test.csproj package Moq
<ItemGroup>・
    ・
<PackageReferenceInclude="Moq"Version="4.13.1"/></ItemGroup>なお、インストールしたパッケージは、dotnet list packageで確認ができます
$ dotnet list package
Project 'Domain' has the following package references
   [netcoreapp2.1]:
   Top-level Package               Requested   Resolved
   > Microsoft.NETCore.App   (A)[2.1.0, )   2.1.0

Project 'InMemoryInfrastructure' has the following package references
   [netcoreapp2.1]:
   Top-level Package               Requested   Resolved
   > Microsoft.NETCore.App   (A)[2.1.0, )   2.1.0

Project 'Test' has the following package references
   [netcoreapp3.1]:
   Top-level Package                Requested   Resolved
   > coverlet.collector             1.0.1       1.0.1
   > Microsoft.NET.Test.Sdk         16.2.0      16.2.0
   > Moq                            4.13.1      4.13.1
   > xunit                          2.4.0       2.4.0
   > xunit.runner.visualstudio      2.4.0       2.4.0

(A) : Auto-referenced package.
まとめ
Visual Studioほどでは無いにしろ、そこそこ開発できる環境までは整いました。
なにより、Visual Studioのもっさり感が、VSCodeでは感じないのが嬉しいです。
dotnet-cliは今回初めて使いましたが、リファレンスもちゃんと書かれており、結構扱いやすかったです。
参考にしたもの
Visual Studio CodeでC#プログラミング - Qiita
.NET Core コマンドライン インターフェイス (CLI) ツール - .NET Core CLI | Microsoft Docs
選択的単体テストの実行 - .NET Core | Microsoft Docs